Remote Controlled Car using ESP32
2021-02-22
Because of COVID break, I got some time at home for a project before school started. So I wanted to remake the Arduino Car I made previously.
The main change I wanted to do were:
- Lower video latency
- Add voice streaming (didn't finish this one)
- Custom designed circuit that combines motor driver, audio amplifier, and power supply into one.
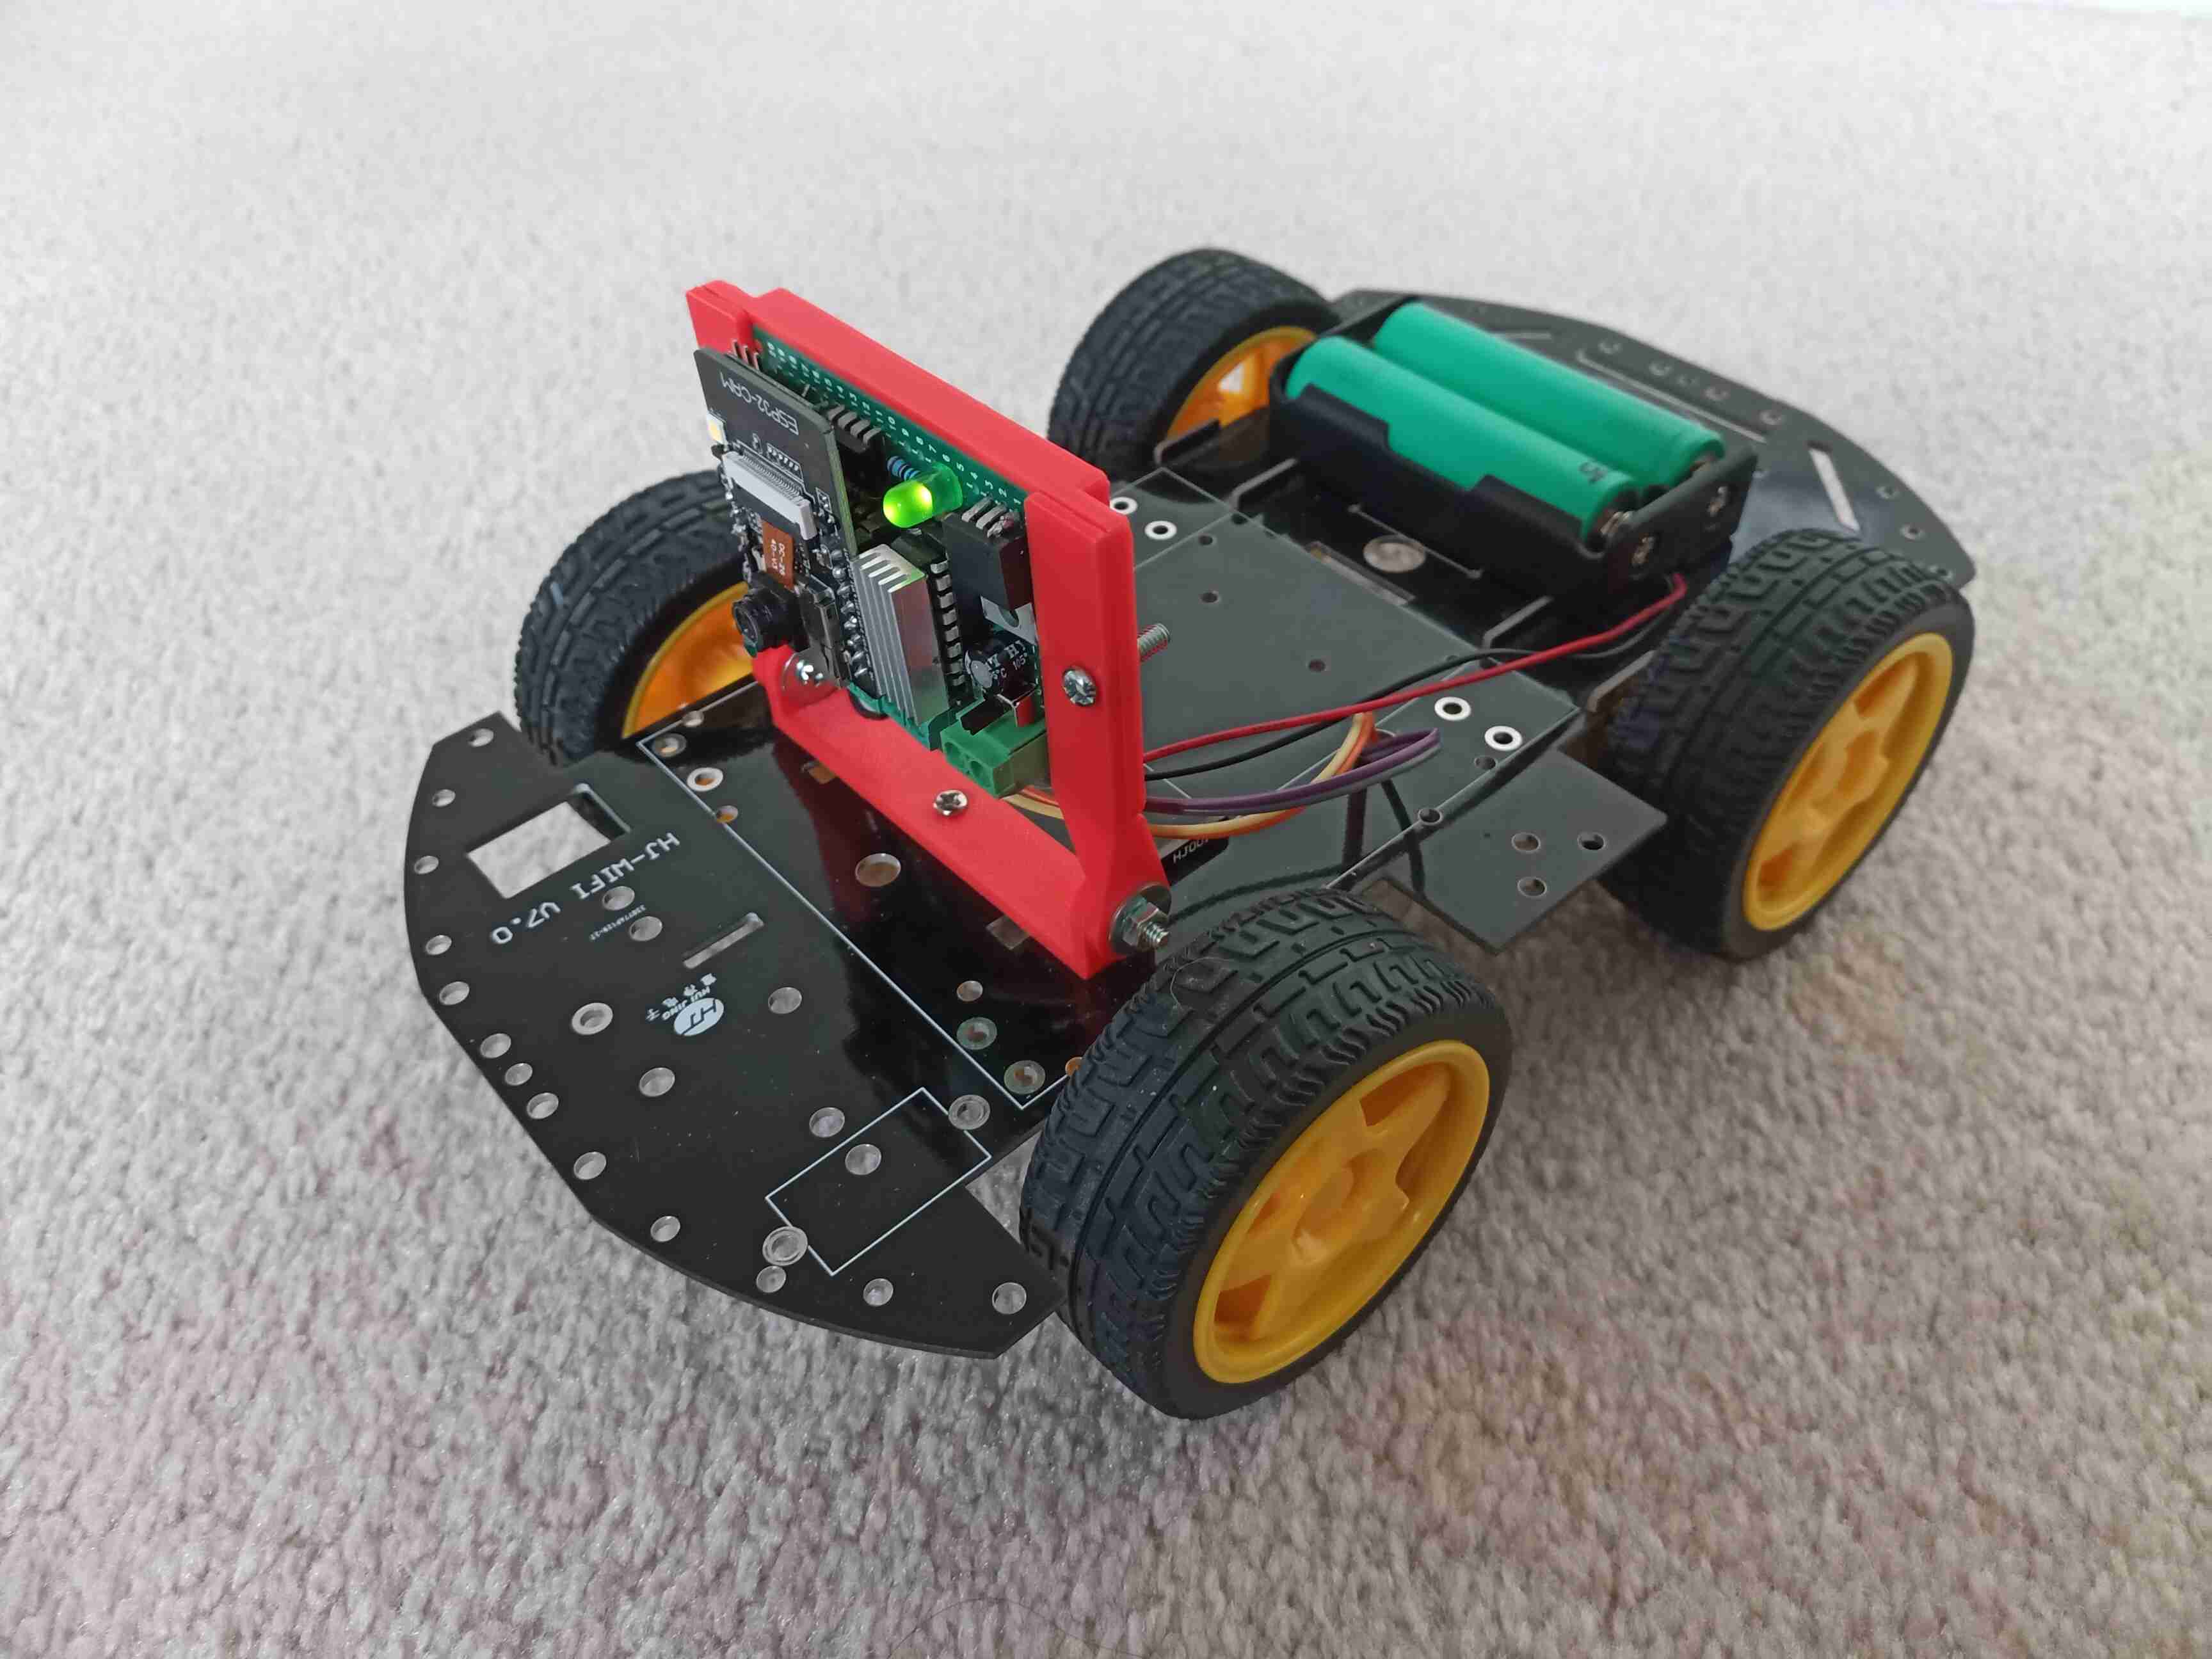
I'm using ESP32 for this project again because I like it. The builtin wifi is very useful, and the ESP-IDF framework provides a lot of programs to use. The ESP32-CAM board I'm using also comes with a camera, which suites this project even better.

Schematics of the board.
Because I wanted to stream audio with this, I needed to do some modifications to ESP32-CAM board to free up availabel ADC pins. I removed an on-board LED, and tied camera power pin to be always-on to free up GPIO32 and GPIO33. (Although I didn't end up using them because there wasn't enough time to get audio to work.)
Other than that, the rest is just connecting IO pins to different components. The circuit is assembled on a perfboard which is pretty straight forward. The routing is a little messy but it's not too bad.
I tested the audio circuit on a breadboard before putting them onto the perfboard and it was amplifying the signal just fine, with around 1V peak-to-peak. But for some reason I wasn't able to detect the signal after soldering them on. By then I only got a few days before I fly out again, so I wanted to focus on getting the software part done first.
The motors are driven by L293D, controlled using MCPWM library from ESP-IDF.
The whole circuit is hold up by a 3D printed mount I made in FreeCAD. I avoided using Solidworks because of it locking me out of my own files before when I was making my telescope. I also made a pair of "ears" for microphones to go in, but they didn't get used in the end because I didn't have time to get the audio working.

FreeCAD model
The firmware has to main components: a camera task that grabs the camera framebuffer send it over wifi, and a control task that receives commands from wifi and drives the motors. Both tasks are managed by FreeRTOS that came with ESP-IDF framework. I'm using UDP to send the data and commands, since it's easier to deal with datagram based protocol, plus it has less latency than TCP especially with wifi (I do wish SCTP is more popular though, it would've been useful for this project if it weren't unsupported by LWIP).
For the video feed, the reliability of each frame doesn't really matter as having a few frames missing or corrupted is fine for a video. I was able to pipe a stream of JPEGs (using JPEG because the camera chip supports it, and it is compressed, allowing higher FPS) into ffplay and had it play the stream.
Video stream over UDP packets.
For the control, I made a simple mechanism to ensure the car is in the expected state. Basically the firmware would send its current state to the remote controller in an interval, and the controller would send commands back if the state differs from the expected one. A watchdog-like timer is used to stop all motions when no packets is received from the controller for some time. This approach isn't the most efficient traffic wise, but it works in a LAN where not much other traffic is transmitted, but it's pretty simple way to get reliable delivery over UDP.
Lastly, the remote controller program was a simple Python program I rigged up
quickly on the last day. Python has a lot of packages that makes it really easy
to quickly write a program to do a task. For the controller, socket, struct,
subprocess provides all the functionality to connect to the car and stream
video to ffplay; the pynput package allows it to listen to mouse and keyboard
without needing a GUI framework or a game engine; and dnspython makes it easy
to find the car on the network through MDNS. So all I needed to do is write code
that glues all of them together to get a working controller. It's not the
fanciest control program out there, but it's simple and it works.
One big problem of the design is the use of linear regulators. It turns out wifi uses a lot of power (a few hundred mA), and converting 8V battery power into 3.3V using a linear regulator at this much current generates a lot of heat and wastes power. Because of this, I didn't attach a servo to the final design. Next time I'll use a switching regulator instead.
But in the end, I got a working car before the deadline, and it has a much lower latency compared to the Android + Arduino Car I did before, so I'm happy.
The code, schematic, and 3D models of the project is on Github.